If you are not able to add the Disputifier team as a user on your chargeback portal, and you are also not able to disable 2FA, you may be required to set up 2FA forwarding.
2FA forwarding sends the 2 factor authentication code from your email to ours.
To set up 2FA forwarding, please follow these steps:
Setting up 2FA forwarding with Zapier
Create a Zapier account if you don't have one already.
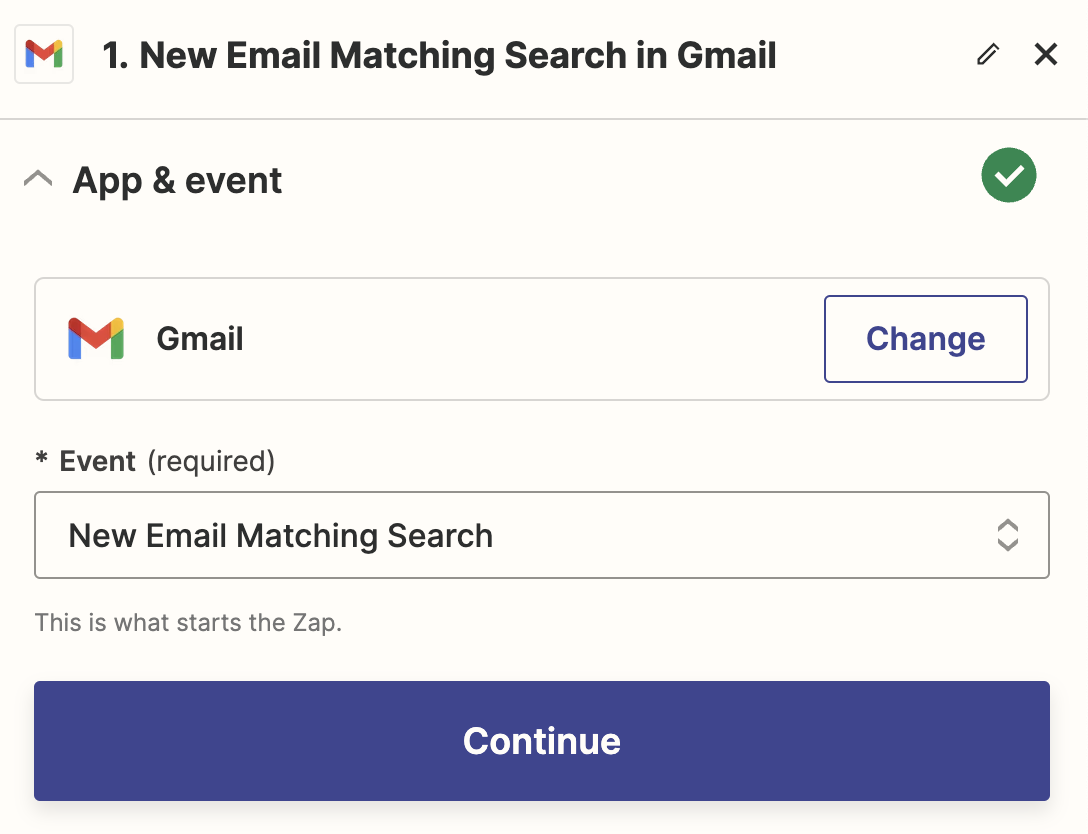
Add your email account. In this case, gmail.

For the event, select "New Email Matching Search"

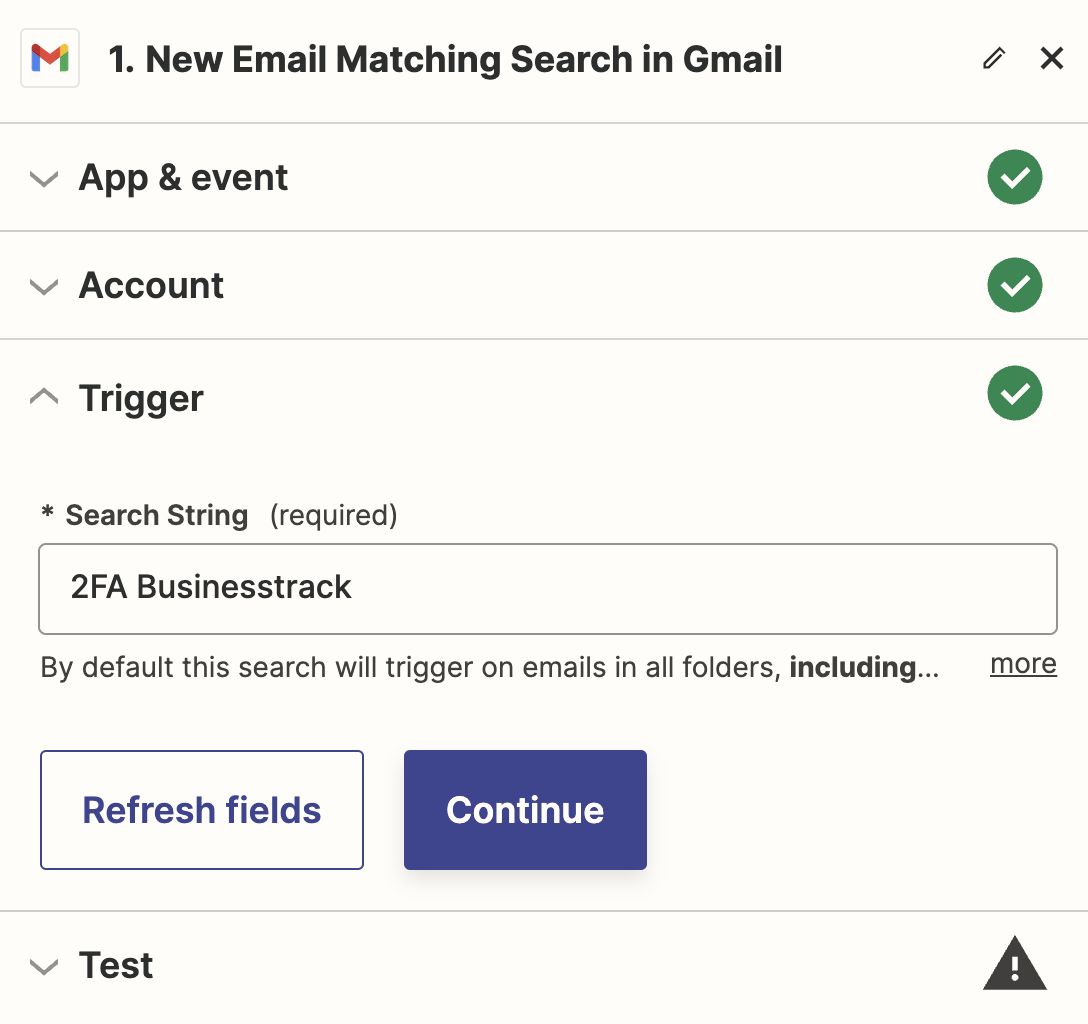
Next, input the subject line (or partial subject line) for the 2FA email. For example, Businesstrack would be "2FA Businesstrack"
Click continue & test your trigger.

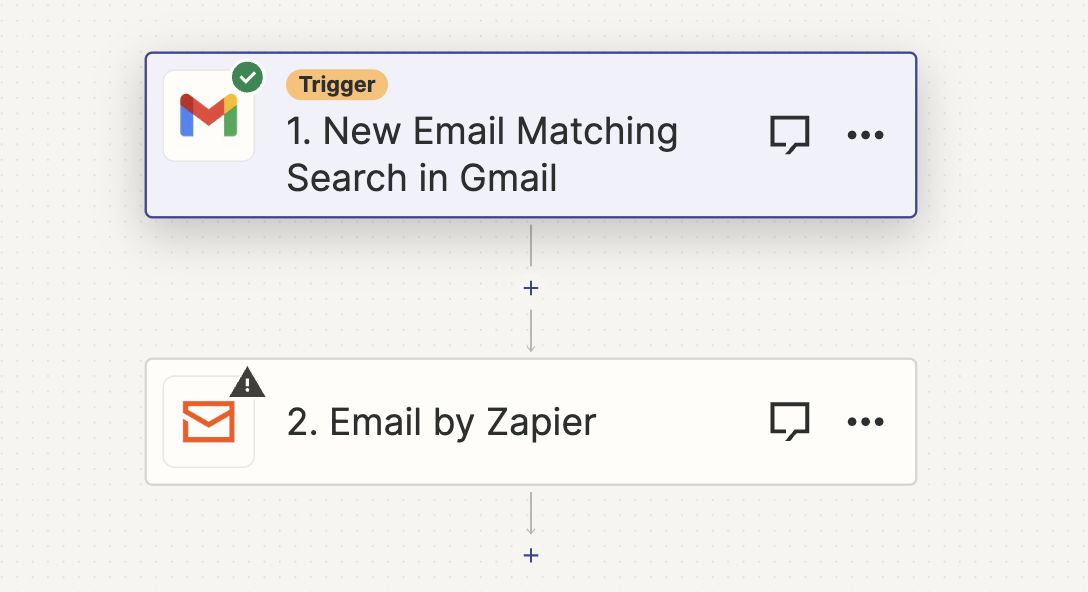
Next, select "Email by Zapier" under "Action"
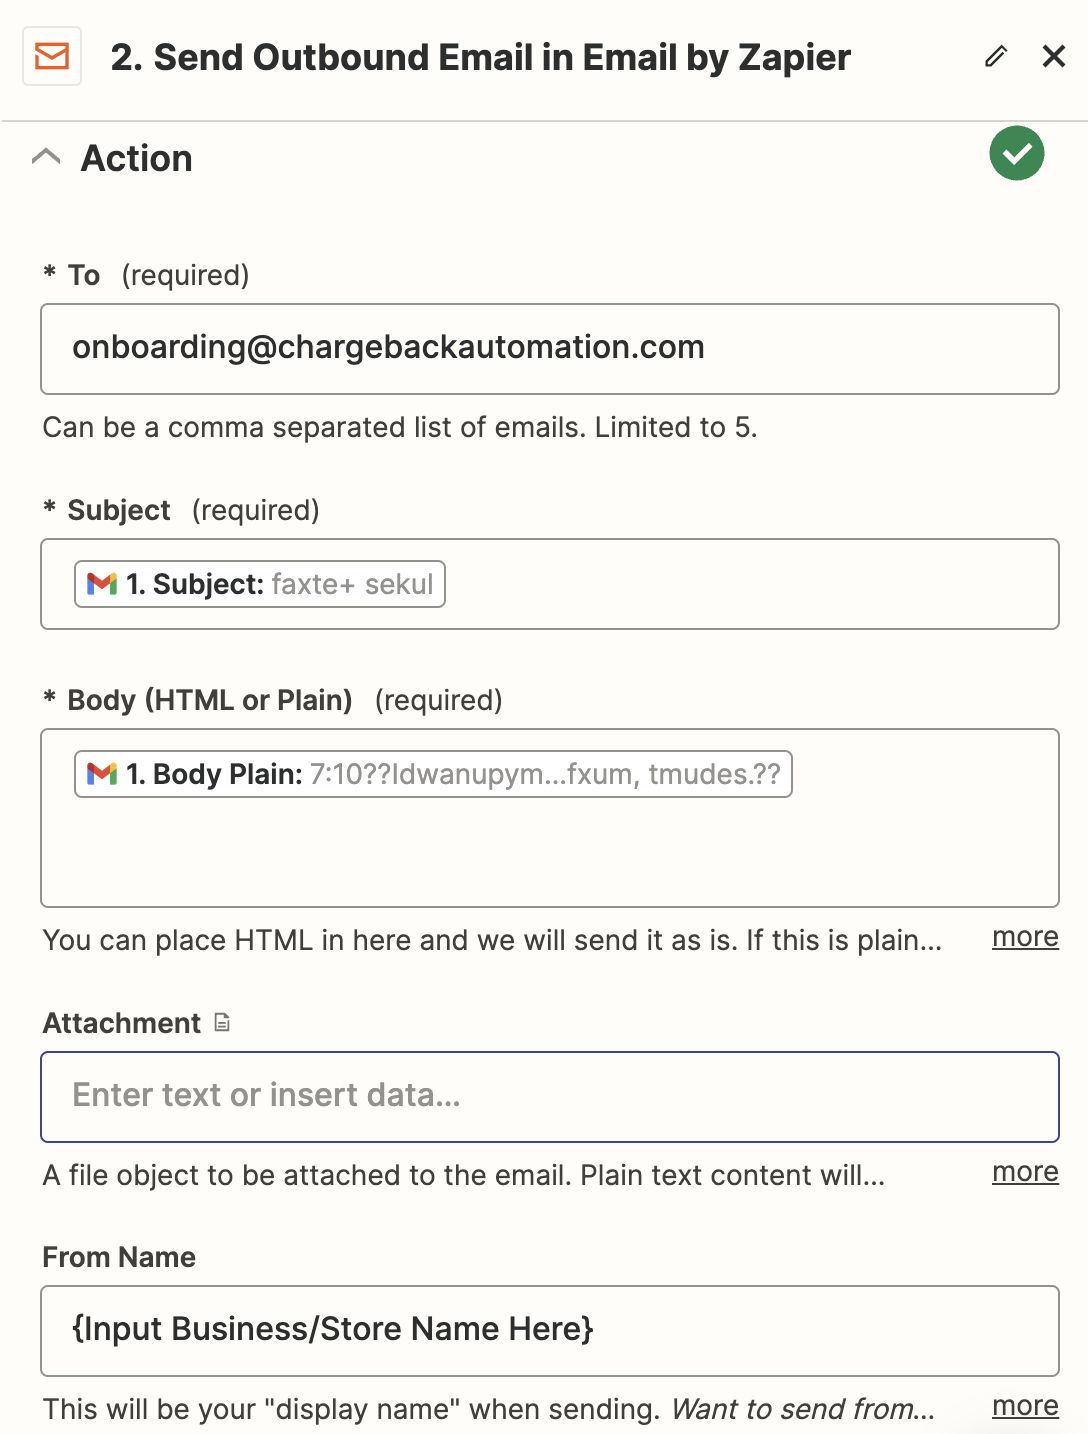
Then select "Send outbound email".

Input the following details. Be sure to input your business or store name in the "From Name".
Test and publish the automation.
That's it! You're done.
If you cannot use Zapier for some reason or another, it is also possible to set up 2FA forwarding through Gmail natively. Please let us know if you need instructions for this.